Login page
The login page is where returning customers start. Ignite gives it an image and room for your own message, such as the perks of having an account, and can show a popup login instead.
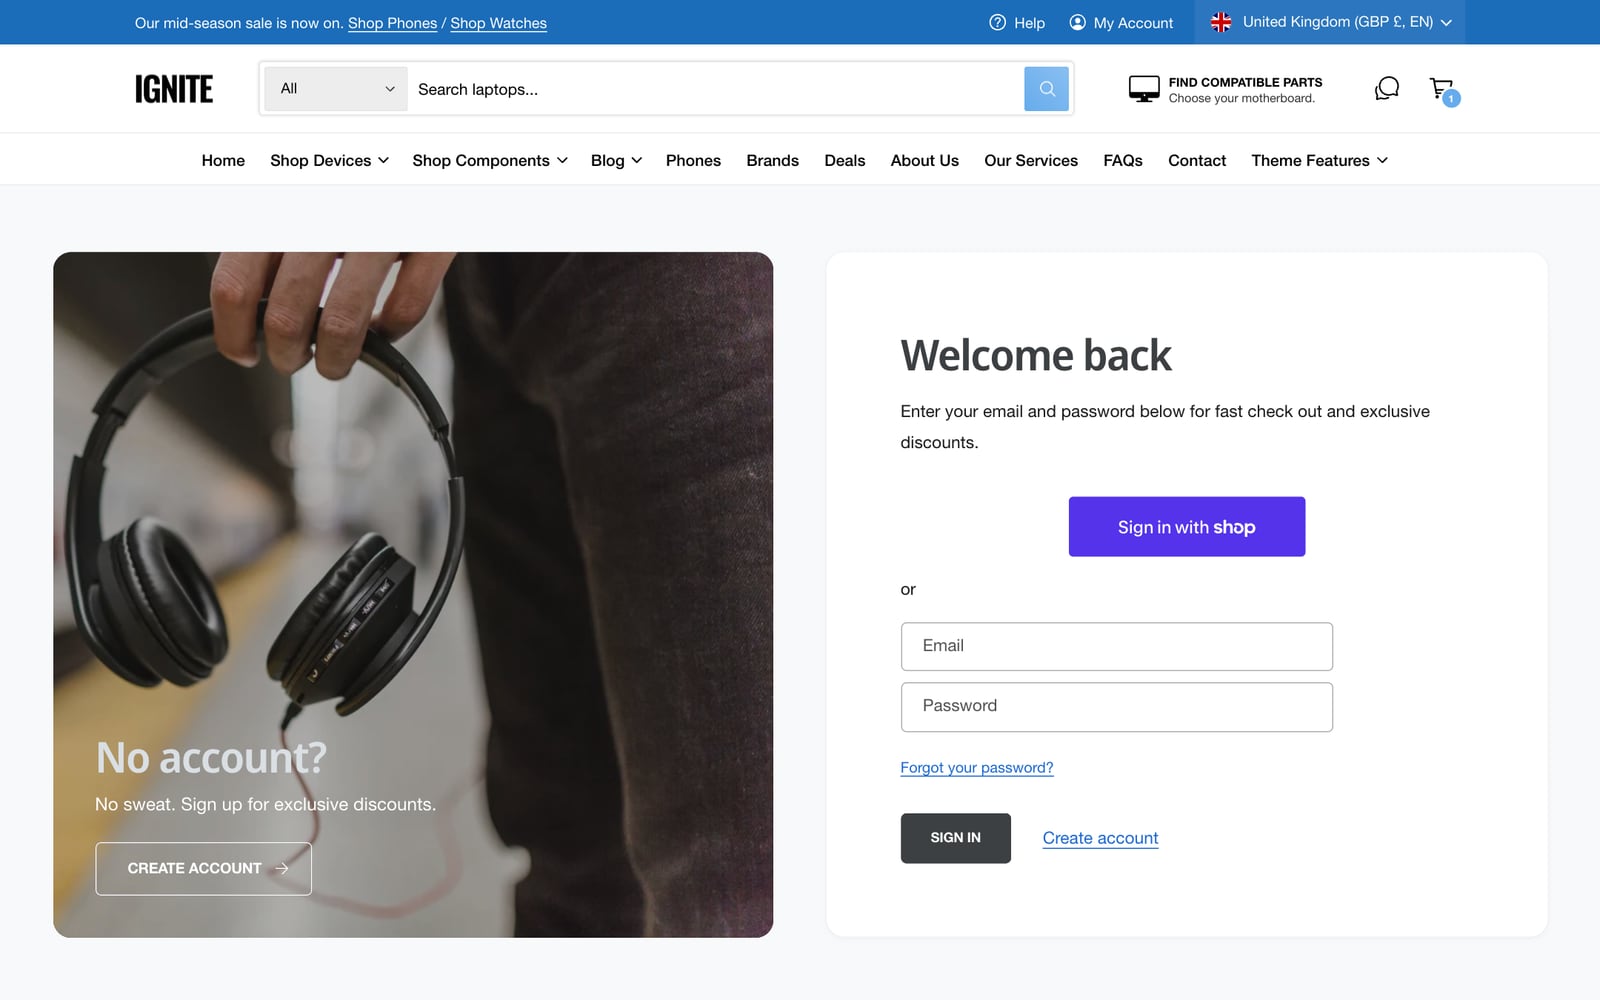
Edit the login page
- In the theme editor, use the menu at the top to open the customer login page.
- Click the Login section.
- Choose an Image, and edit the heading and text over it, such as “No account? Sign up for exclusive discounts.”
- Click Save.
- Enable Sign in with Shop: lets customers log in with their Shop account. On by default.
- Show register link: in the Login form block, a link to create an account.
- Header button: a button over the image, such as Create account.
- Add blocks, such as text, icons with text or images, to list the benefits of an account.
Layout
- Image width on desktop and Image placement on desktop: left or right.
- Show over image: puts the heading and text on the image.
- Minimum height on desktop and mobile, and Full width.
- Section, form and header color schemes, and Show form shadow.
Account links in the header
In the Header section, under Customer accounts, show the account icon on desktop and mobile, and set Login style to Popup or Legacy. The popup opens a sign-in window without leaving the page, and shows a menu of account links once customers are signed in.
See also Registration page.
Common questions
Can customers log in with a popup instead of a page?
Yes, with new customer accounts. In the Header section, set Login style to Popup. It doesn’t work with legacy customer accounts.
How do I add Sign in with Shop?
Enable Sign in with Shop is on by default in the Login section.
Why can’t I find the login page in the theme editor?
With new customer accounts, Shopify hosts the sign-in page itself, so the theme’s login template isn’t used. Style it in Settings > Customer accounts.